I am using a laptop which only has 32GB for its main storage. Unfortunately, this becomes full quickly if I will be installing a lot of programs and add some cloud storage to it.
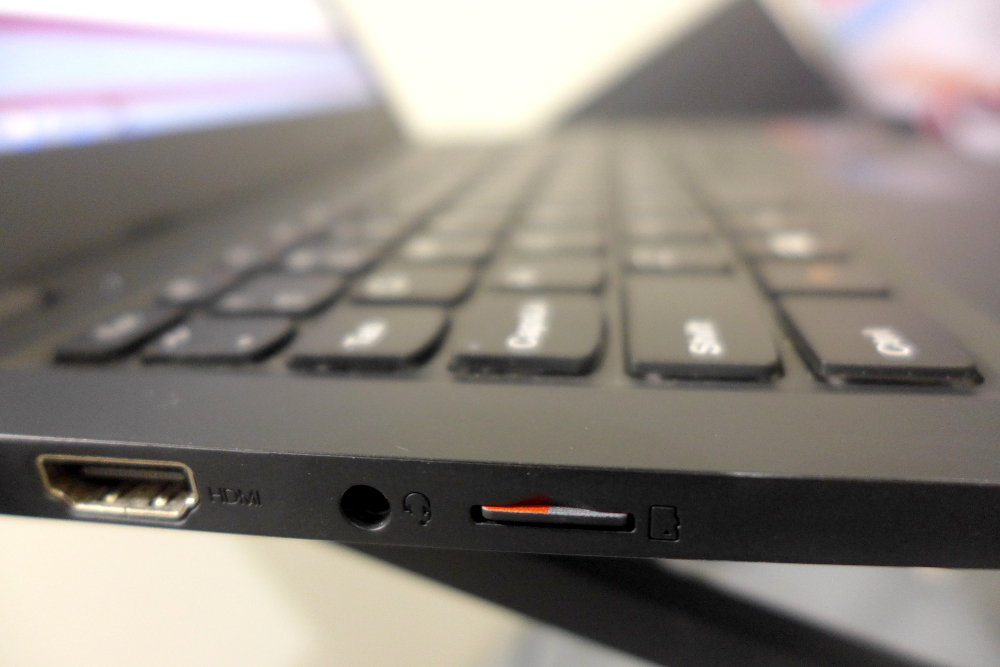
Fortunately, the computer has a microSD Card slot which I can use to expand my storage, but I could not install programs or put my cloud storage directory to it since it is not recognized as a Permanent Storage by Windows.
Do not worry, though, there is actually a way to make the Windows see your SD Card as a Permanent Storage. Below are the steps that you need to do.
Note: This tutorial would also work on Windows Tablet who also has the same problems as I have.
1. Make sure that your SD Card is formatted to NTFS
To be able to mount the SD Card as a Permanent Storage it must be formatted to the same file system as your computer’s main storage file system. For Windows 10 case the main file system is NTFS.
Usually SD Cards are formatted in FAT32 but let us check first.
Insert your SD Card on your computer.
Open a File Explorer and navigate to This PC.
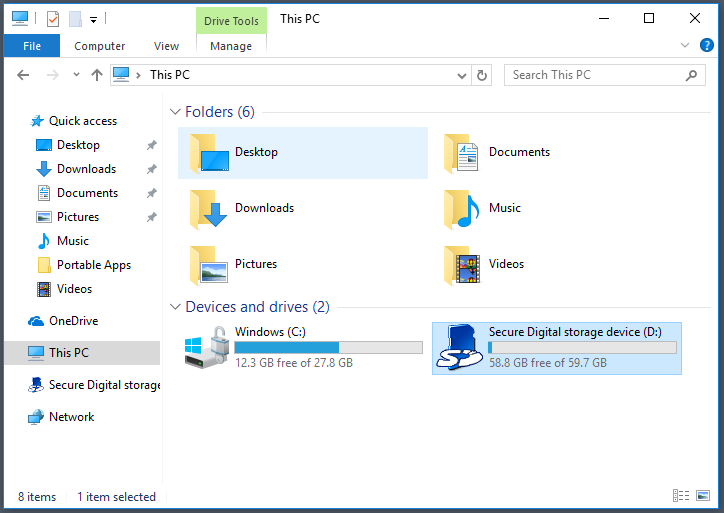
Right Click on the SD Card Drive and then press Properties.
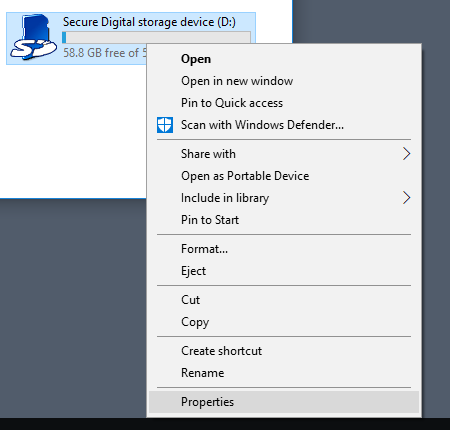
Check the File System on the Properties window.
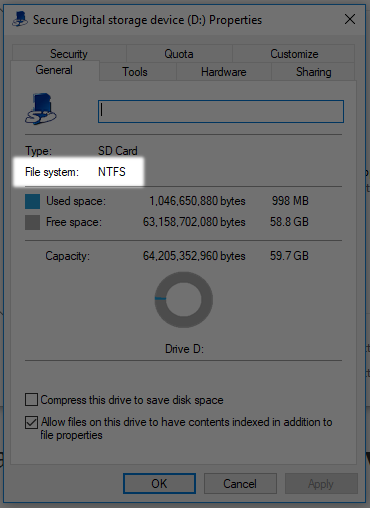
If the File System of your SD Card is NTFS, then you can jump to Step 3. You no longer have to do Step 2.
If the File System of your SD Card is other than NTFS (i.e. FAT32) then you would need to do Step 2.
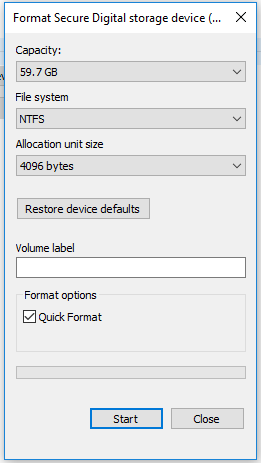
2. Format the SD Card to NTFS
Warning: This step would remove all the files in your SD Card. Be sure to back-up before doing this step.
Right Click again on your SD Card Drive then click Format…

On the next window select the File System to be NTFS.
You can leave all other properties as they are. Personally I leave the Volume Label blank and the Quick Format checked.
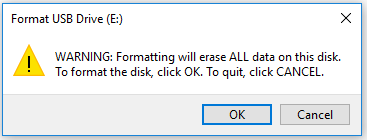
Then the Formatter would warn you that it would delete all files. If you are okay with this, then press OK.
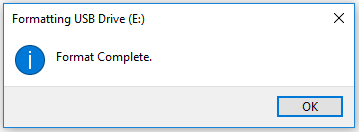
This will start the formatting process and when it is finished then another Window will pop-up and tell you that the Format is completed.
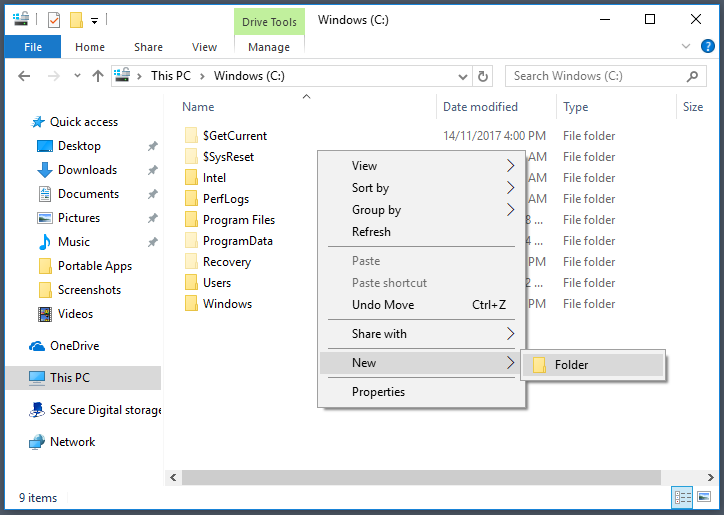
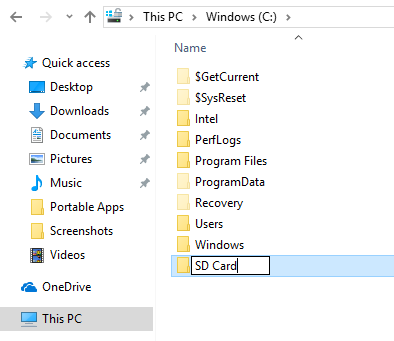
3. Create a Folder in your Main Drive
Open a File Explorer and go to C:. Then create a folder named SD Card.
4. Mount the SD Card to the folder that we created in C:
Press the Window Key and search for Disk Management.
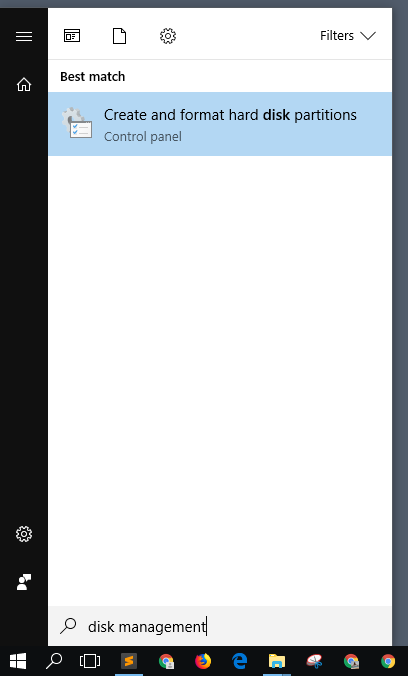
Click on the Create and format hard disk partitions. This will open the Disk Management window.
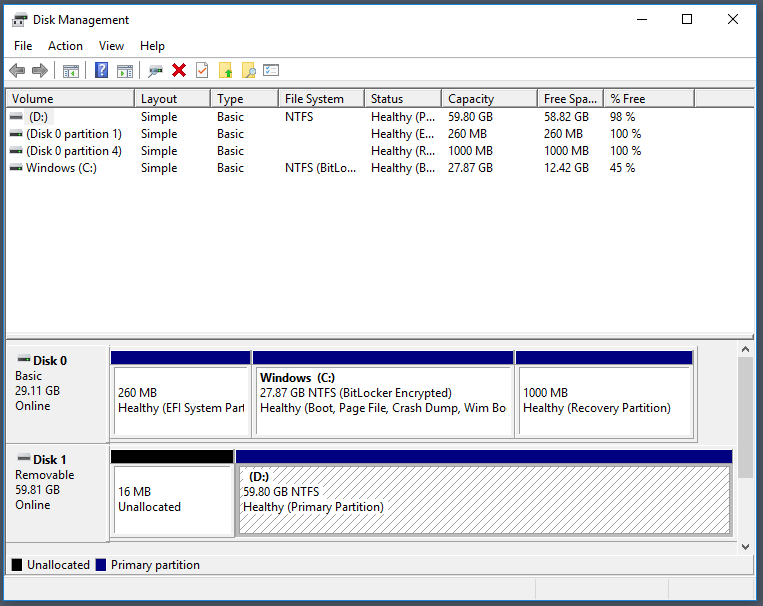
Search for the Drive of your SD Card. This is listed as Removable.
Right Click on the Drive of your SD Card then click Change Drive Letter and Paths…

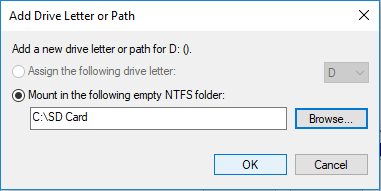
Click Add.

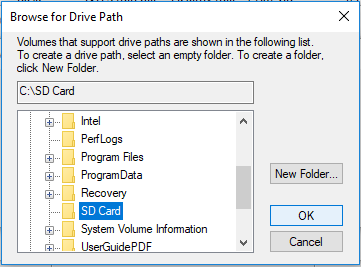
Click on Browse.
![]()
Then search for the folder that you have made (C:\SD Card). Select the folder then press OK.
You will now see that the folder that you created will be on the Mount Path. Press OK.
You may now close the Disk Management window.
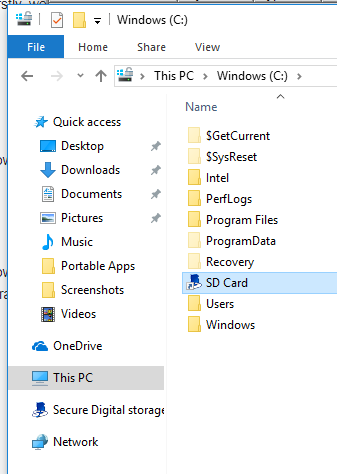
5. Checking if the SD Card is mounted properly
Go to the C: Folder and you will see that the icon for the SD Card folder is no longer the Folder Icon but it looks like an icon that says SD.
When you go inside the SD Card folder you will see that you are inside your SD Card but instead of it having a path different to C:, it is now mounted as a C:\SD Card.
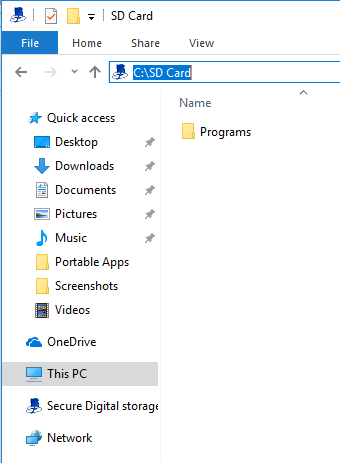
You may now set a path for software installation to C:\SD Card or point a Dropbox folder to sync to the same path.
The post Making an SD Card as Permanent Storage in Windows 10 appeared first on Radish Logic.


